What is control? Lack of control? What about being a control freak? Turns out we all have some relationship to control, whether it’s our own or someone else’s. On this week’s TradeshowGuy Monday Morning Coffee I take a look at control:
This is a guest article by Halle Summers of Fastenation.
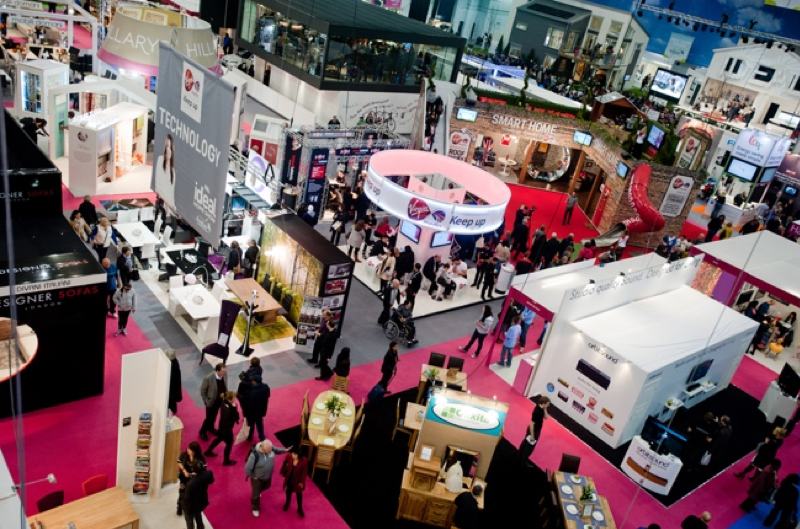
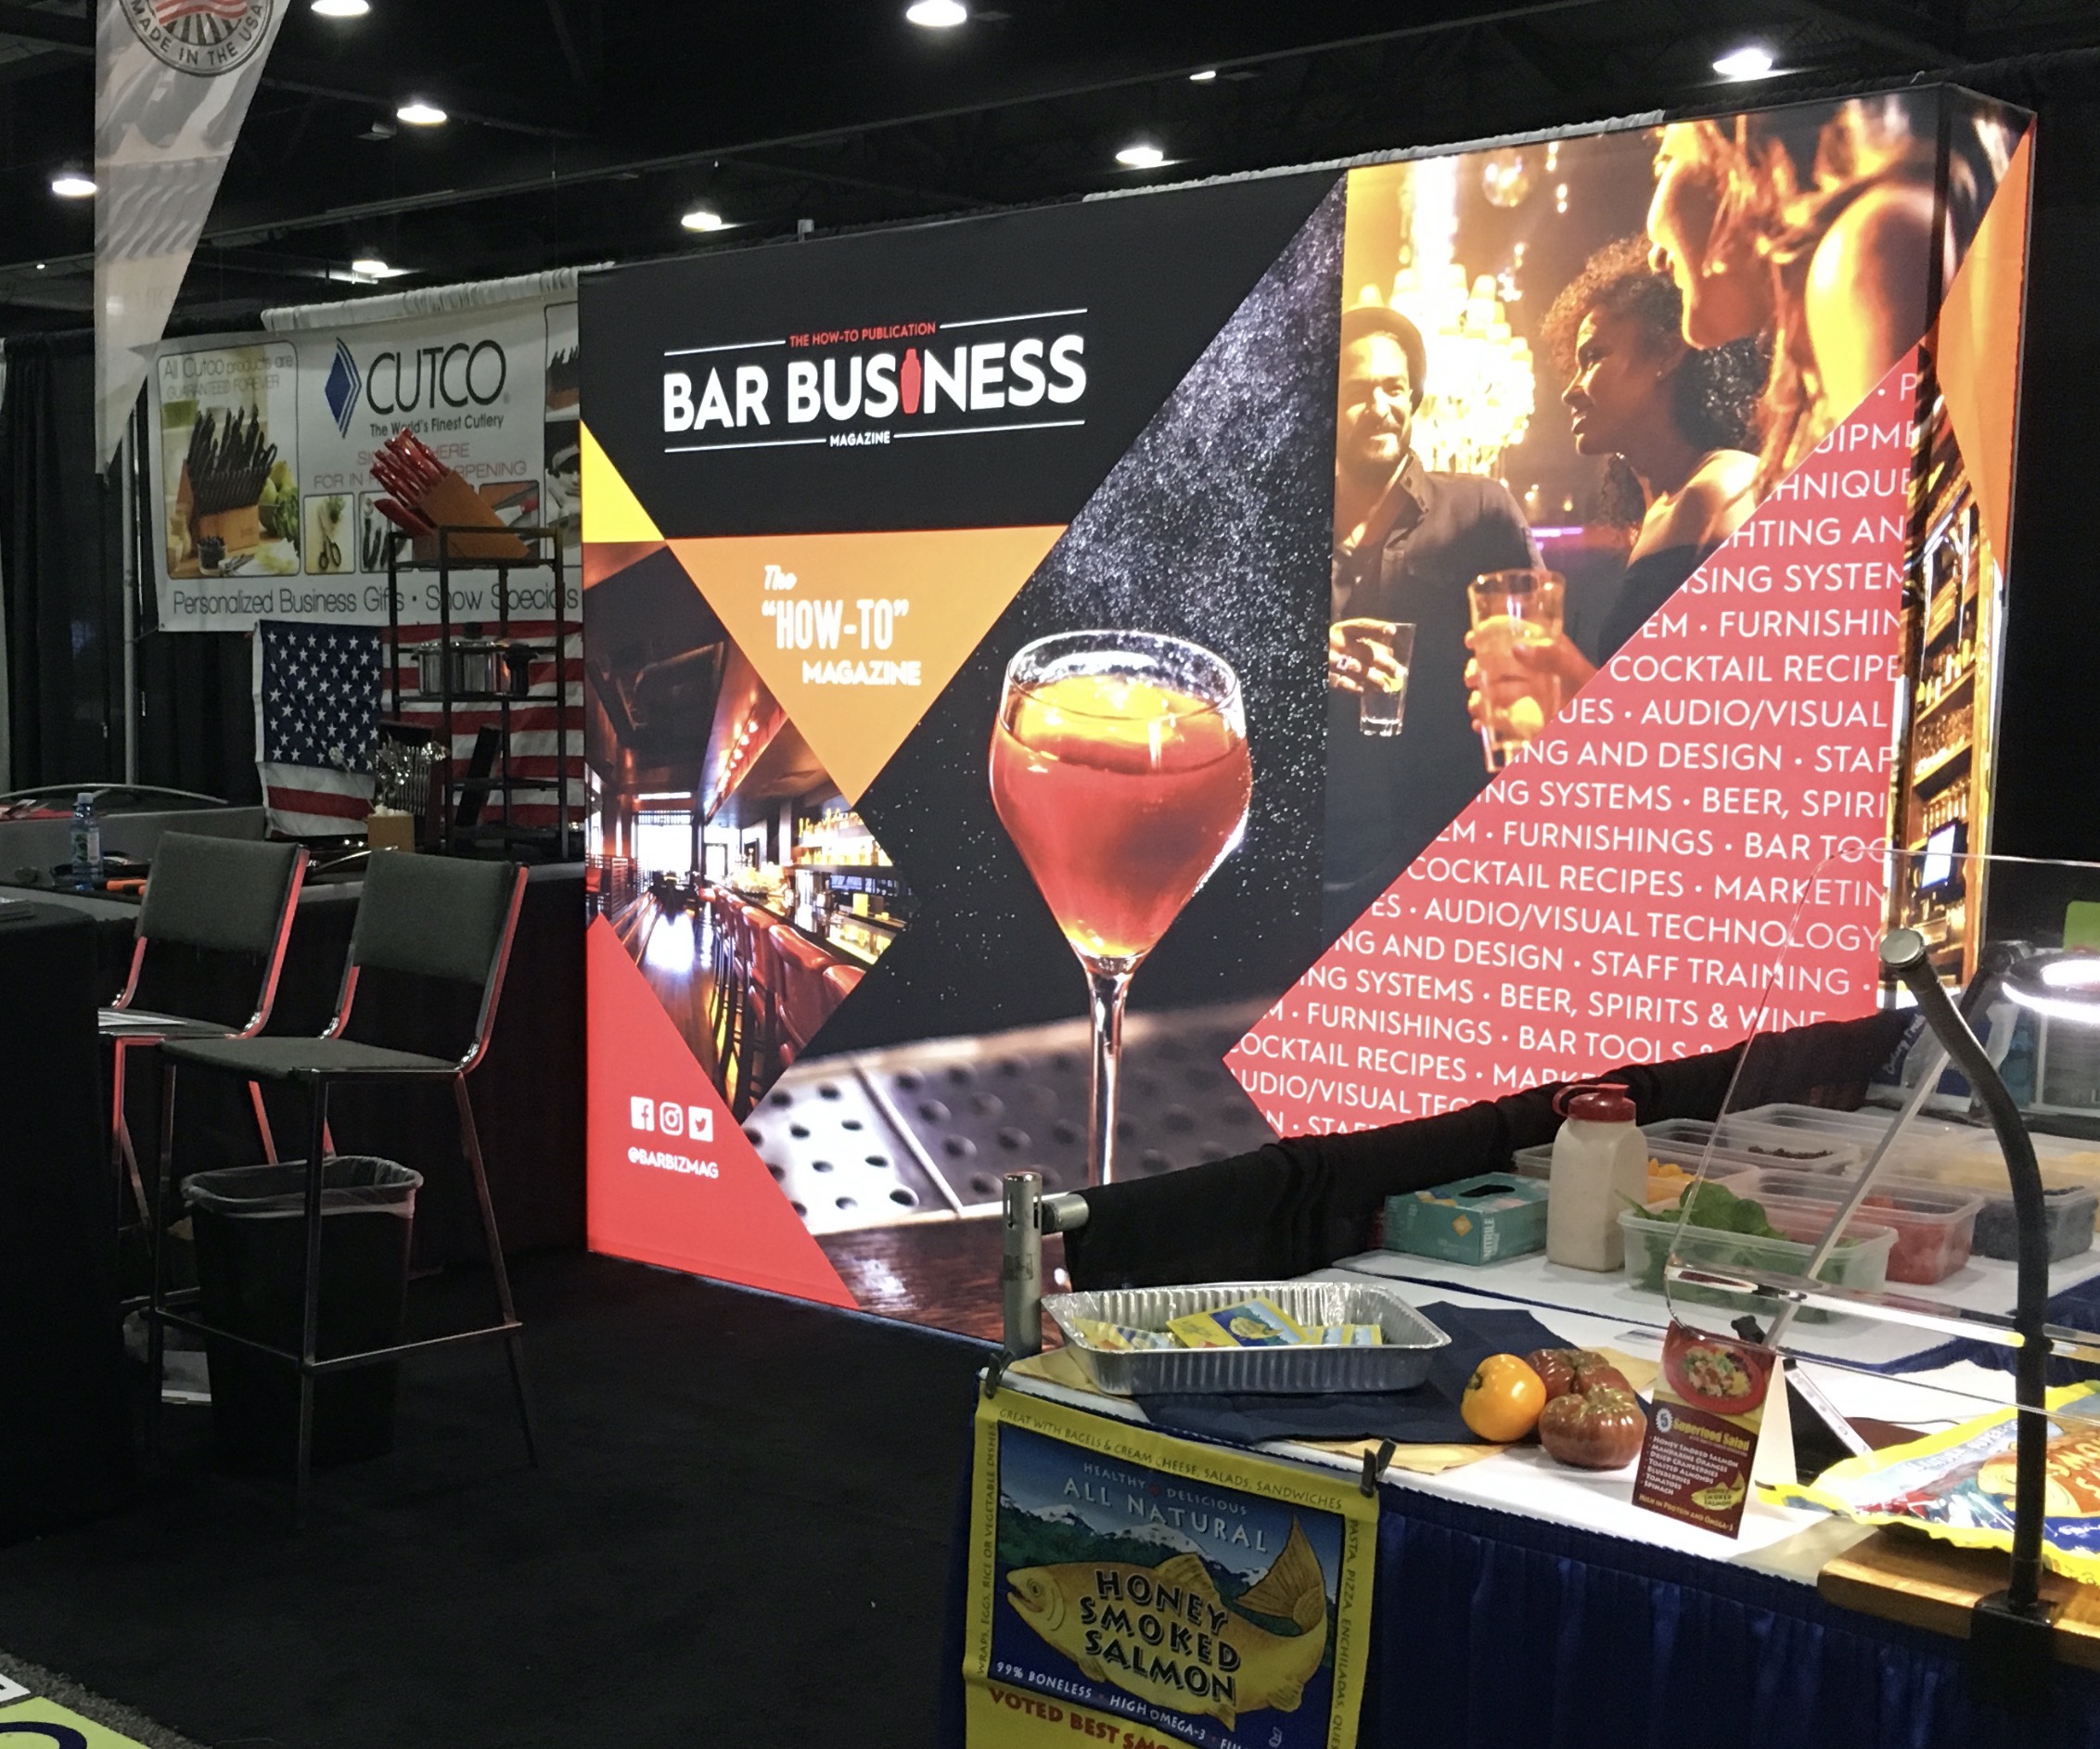
If you are planning on attending or setting up a booth at a tradeshow for the first time, you probably already know how valuable these events are for growing a business. They offer numerous opportunities for increasing awareness of your brand, making sales, and networking with prospective customers and clients. While business is increasingly being conducted online, trade shows provide an opportunity for business owners and consumers to meet face to face, forge relationships, and learn about new products.
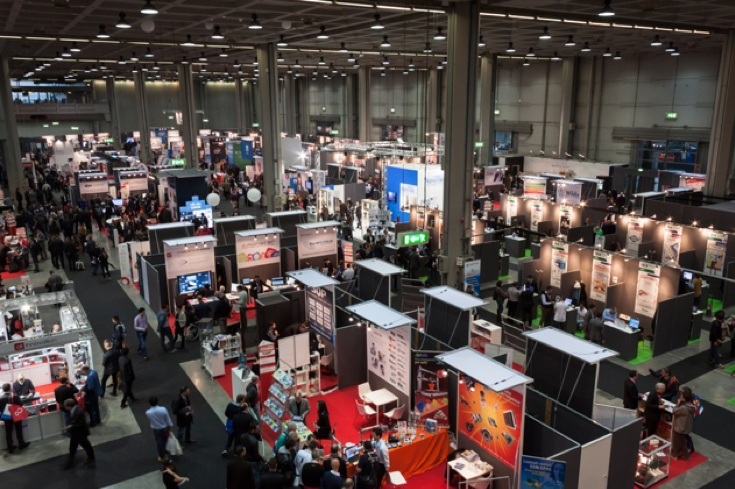
If you have ever attended a tradeshow, it should come as no surprise that exhibiting at one requires a lot of work and careful planning. It’s often necessary to start planning several months in advance to ensure that you have everything you need by the time the event makes its way into town. There is a massive amount of competition at these events, and, if you just show up and hope for the best, your booth will likely get lost and be overlooked by most attendees. If you are gearing up to be an exhibitor for the first time, here are a few essential tools and tips to ensure the success of your first trade show event.
Make Assembling an Eye-Catching Display
Your Top Priority
The human attention span tends to be pretty short. When
people are surrounded by all sorts of exciting things to see and do, it can be
even shorter. This means that you only have a few seconds to capture the
attention of event attendees and draw them into your booth. If your display
isn’t eye-catching, a lot of people will likely pass by your booth without even
stopping.
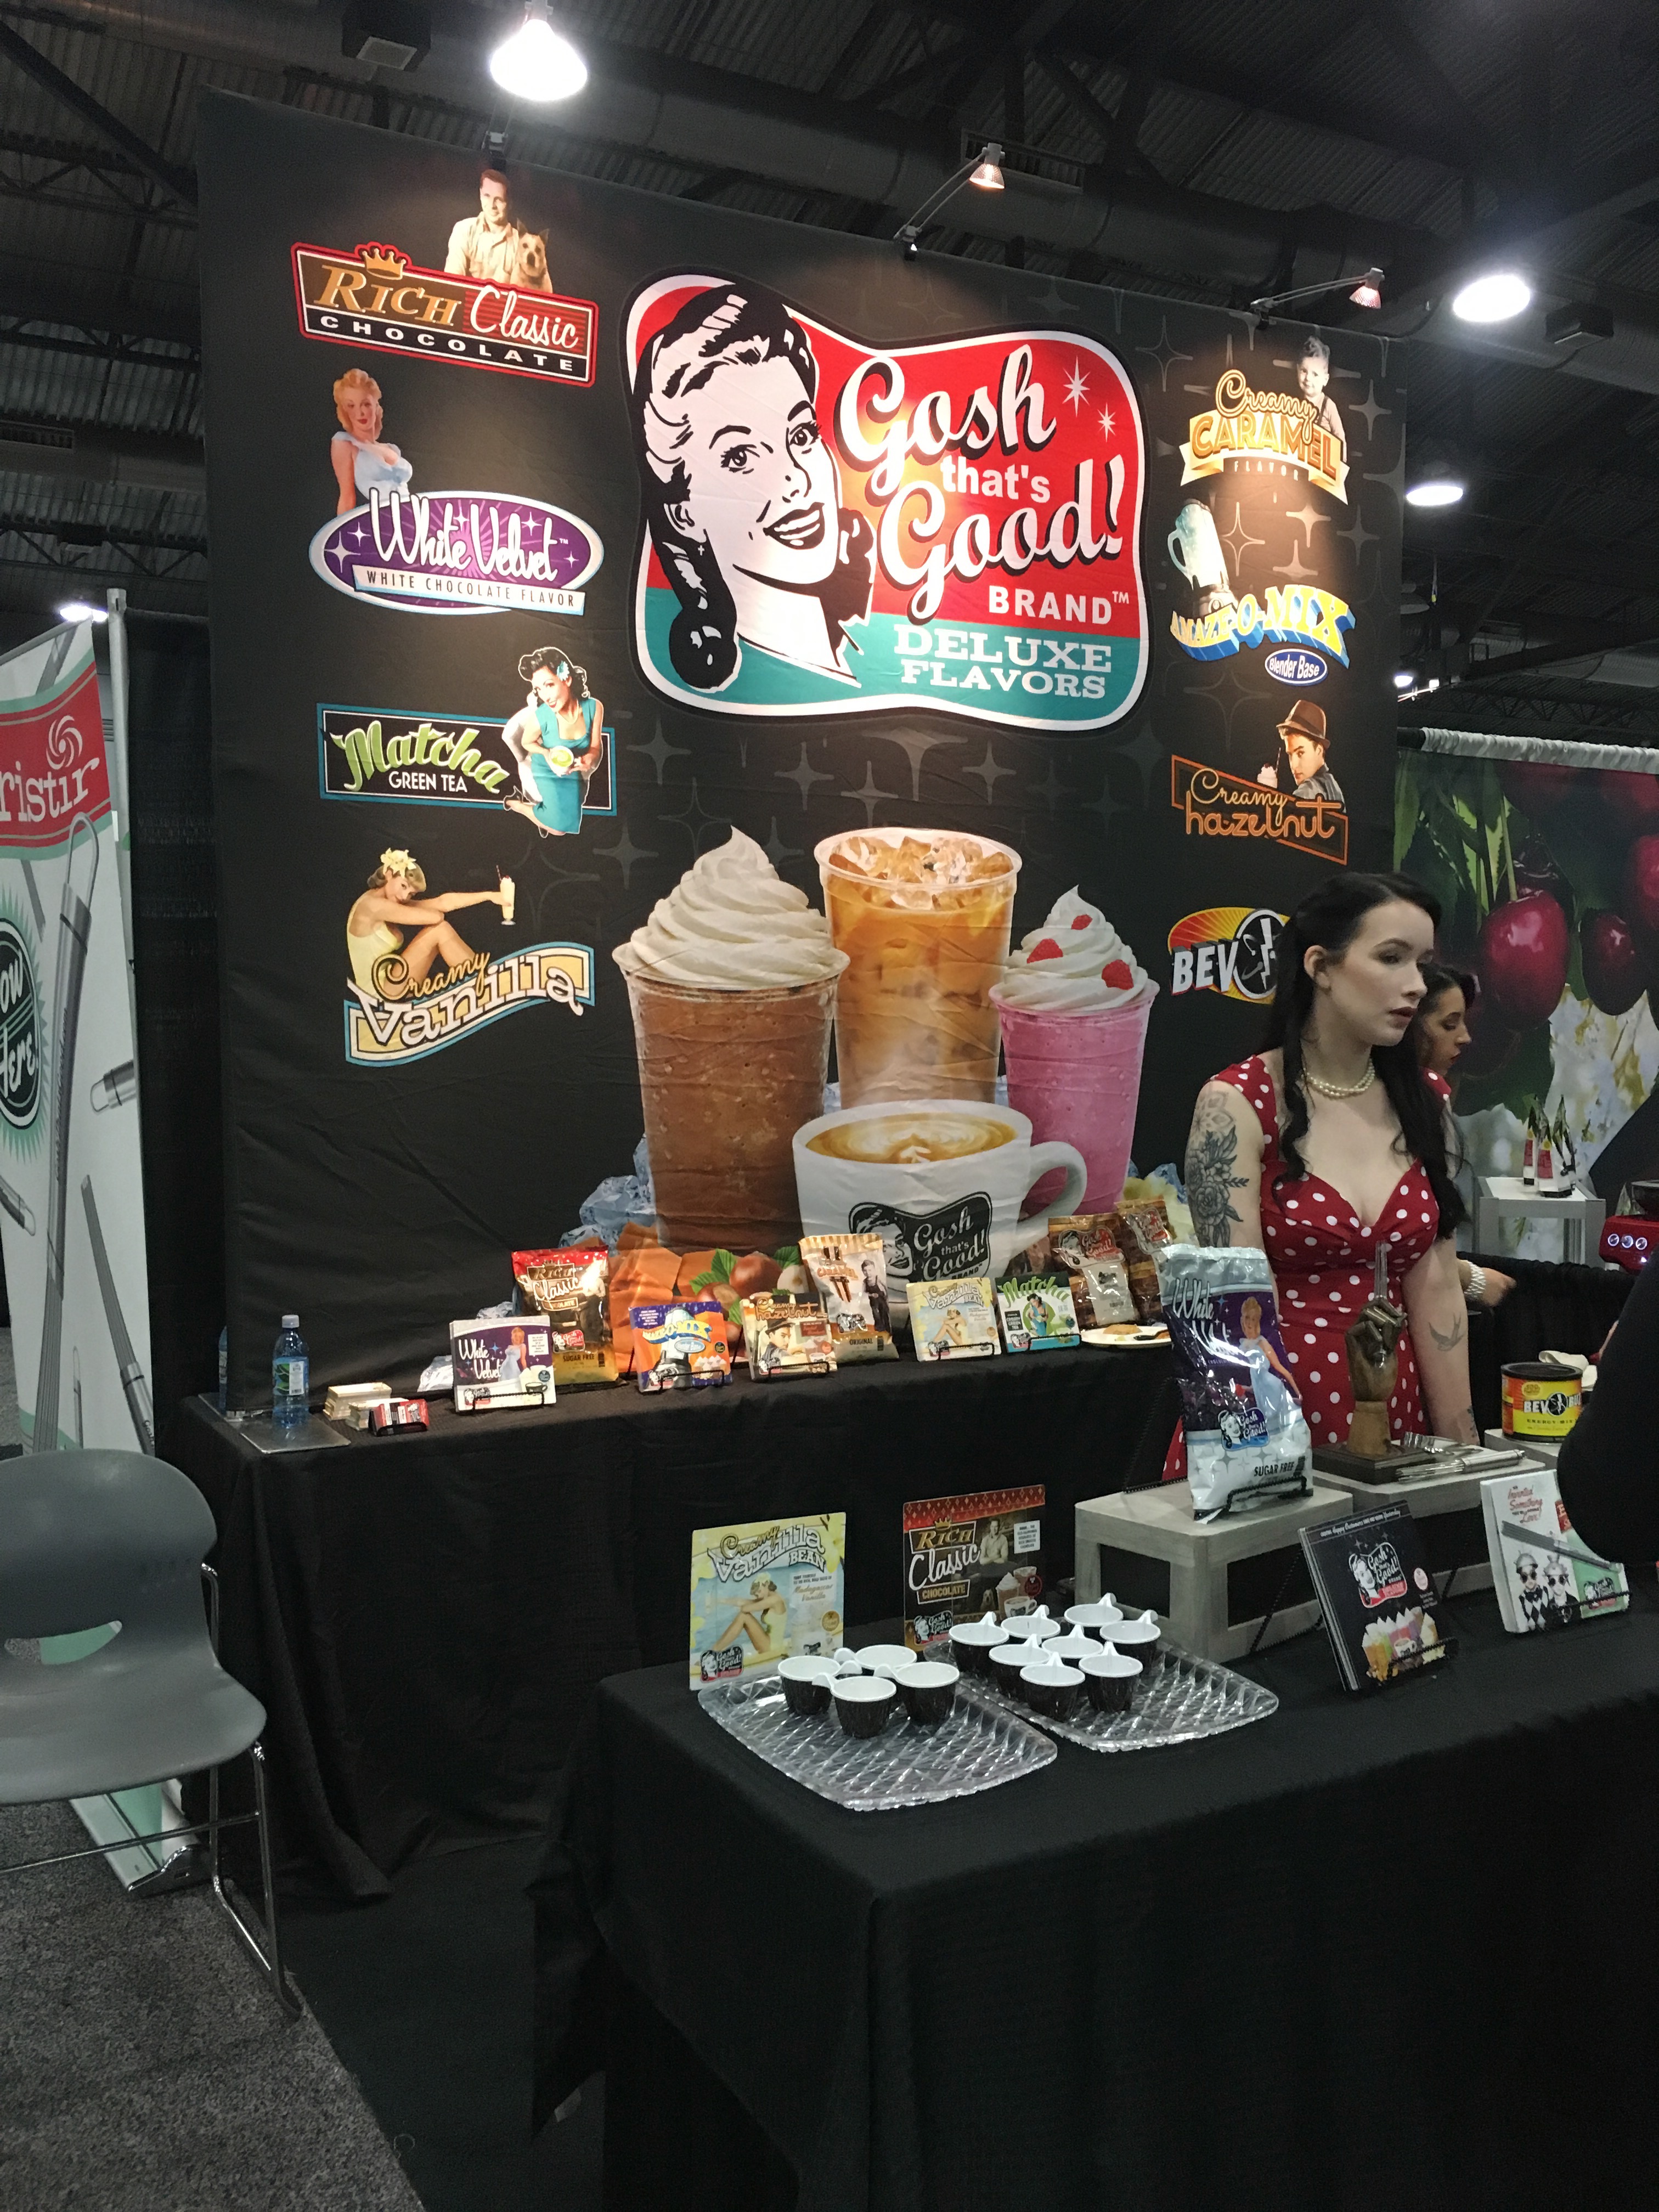
The good news is that assembling an eye-catching tradeshow display doesn’t have to be difficult. Use attention-grabbing images instead of words. Make use of bright (but appealing) colors. Have products on display. Make your booth feel welcoming. There are all sorts of things that you can do to put together an amazing display. When you’re packing up to head to the event, make sure you have the right tools and supplies for setting up your display. Things like gaffers tape and VELCRO® brand hook and loop tape are lifesavers when it comes to hanging banners, putting up signs, and assembling the various parts of trade show booths. Table skirting clips are great for trade shows, too, as are cable hangers. Trust us; few things are worse than showing up at a tradeshow with an awesome display but lacking the tools and supplies needed to set it up!
Prepare Your “A” Team
The people you have working at your booth can have a
huge impact on how well the trade show goes for your business. There are a few
different options when it comes to staffing. You can bring your own employees,
or you can work with an event staffing agency. The downside to working with an
agency, though, is that you will need to put a lot of effort into training your
team and ensuring that they know all of the ins and outs of your business. When
you have your own employees working the booth, they already have a lot of
knowledge about your products and services.
Make sure that the team you assemble is made of people
who are friendly, motivated, professional, and outgoing. You don’t want someone
who is going to sulk behind the table and make zero effort to engage with
attendees! Choose team members who work well together and complement each
other’s knowledge and skills. Ensure that everyone is prepared to handle
questions. Trade show attendees tend to have a lot of questions about
businesses and their products and services. Every single person who is working
the booth and acting as a representative of your company needs to be an expert
on your product and business, and they need to be able to handle inquiries with
confidence and ease.
If your business sells a product, your team needs to be prepared to give product demos, too. Tradeshow attendees want to be able to experience products for themselves before committing to buy, so doing product demos and allowing potential customers to try out your merchandise is a great way to build relationships and make sales. If your company provides a service, you should figure out a way to demonstrate that, too. Show event attendees what you do. Don’t just tell them about it.
Give Stuff Away When you set up a booth at a tradeshow, making money is probably one of your ultimate goals. That doesn’t mean, though, that you shouldn’t give away some freebies. For event attendees, free swag is one of the best parts about going to a trade show. People love free stuff, and they expect to get a lot of it at tradeshows. Promotional items, such as branded notebooks, pens, hats, tote bags, or water bottles, are always big hits. Any type of freebie works, though. You can draw a pretty big crowd by simply handing out some tasty fresh-baked cookies. Get creative and be generous. Doing so gets people talking about your booth and entices attendees to stop by.
Conclusion
Setting up a booth at a tradeshow offers numerous benefits for business owners. If you want to make the most of the event, though, you need to be prepared. Start planning several months in advance to ensure that you have time to order banners, tools, and other supplies, assemble your event team, and provide adequate training. The more you put into planning for your first trade show, the more you will likely get out of it.
When the big day arrives, stick to your game plan, and have fun! Exhibiting at a tradeshow requires a lot of hard work, but there is no reason why it can’t be enjoyable, too.
Halle Summers is a Marketing Coordinator for FASTENation Inc., a premier global manufacturer, technical converter, distributor, and designer of adhesive based fasteners and tapes. Halle enjoys sharing her unique perspective and knowledge through her blog writing. When she isn’t writing articles, she enjoys spending time in downtown Charleston, South Carolina and all the amazing food her hometown has to offer.
Let’s say your company is looking ahead about six months to a show in March and you’re considering a new custom exhibit for the show. If the show is in the early part of March, you have less than six months before seeing the new exhibit leave the loading docks.
So what has to be done between now and then to ensure that you have the exhibit you want for the price you can pay?
First Questions
There are many things that have to be done in the next few months to make the process work well. Let’s start with the basic questions:
What size booth space are you going to need?
What is a realistic budget for the exhibit you want?
What company is going to guide you through the process and earn the business?
The first question, about booth size, is already set. Unless you’re upsizing from last year’s show, it’ll be the same as it was.
The budget question is a more difficult question, and there are any number of ways to look at it. First, when you say “realistic,” does that number come from what the accounting department told you? Does it come from a thorough research into what exhibit properties cost all the way through concept, design and fabrication? And does the budget figure include everything, or only the exhibit itself?
Industry Average Pricing
A couple of good places to start would be to understand what the industry, on average, charges for the various items. Do your research and find out what a typical custom exhibit costs. For example, recent figures show that inline construction can average about $1,340 per linear foot, give or take 10-15%. Which means a typical 10×20 custom inline booth will land somewhere close to $26,000 – $28,000. Could be more, could be less, but that’s a good number to start the discussion.
A recent industry average for custom island construction comes in a bit more – around $160 – $180 per square foot. If you’re looking at a 20×20, multiply 20×20 (400 sf) by $160 and you’ll get a rough budget of about $64,000. At least you’ll have a number in mind when you start getting prices back from exhibit houses.
Exhibit Function Needs
Next, look at the other factors that affect price, the pieces you want in the exhibit. What exactly do you need for the exhibit to function well to show off your products and services? Do you need demo stations? A stage for a professional presenter? Sample tables? Meeting spaces? All those will push the final price one way or another.
Choosing an Exhibit Company
The last question – what company you should work with – is a big one. After all, there are hundreds, if not thousands, of exhibit houses ready, willing and able to do the job. Unless you’re a huge exhibitor (think Microsoft or Nike), you don’t need one of those big exhibit houses. If your company is a small or medium-sized company, going to a big exhibit house has some benefits – and some drawbacks. The benefits are that they are more than capable of handling your job, and they may offer you some very creative designers as part of the mix. The drawbacks might be that if you’re a small client, it’s easy to get lost among all their big clients, which demand a lot of attention. Another drawback is that a larger company has a lot more overhead than a smaller company. They have to pay for a larger space, they have more employees, and so on. It’s a bigger business that they have to keep going.
Smaller exhibit houses also have tradeoffs, but in my experience, the smaller houses – with fewer clients – value those clients like gold and work hard to keep them. They make sure nothing goes wrong, or if something does, they will fix it as quickly as possible. Any business is built on relationships, but with fewer relationships, the importance of each client is paramount. Which would you rather work with? No wrong answers.
Another aspect to consider about which exhibit house to work with: location. Some exhibitors want to be able to stop by and see the progress on a new build. Or once the exhibit has been built, to be able to have the staff nearby to do any repairs or upgrades, or even store the exhibit. But many exhibitors don’t see not having the exhibit house nearby as a negative thing. We do much of our business online and via email and phone that distance is irrelevant. Again, no wrong answers – different people have different needs and priorities.
Timeline from Design to Fabrication
The next question to ask is how long will this take? Hence the title of the blog post.
Again, there are general guidelines, but each exhibit house will have their own schedule and availabilities. Fabrication is often the most straightforward part of the process. In other words, once everything has been decided, there are few surprises. But getting to the final design is what can take time. But it’s time well-spent. The sooner you start the conversation with a 3D exhibit designer, the better off you’ll be.
A good 3D exhibit designer is the key. She’ll know what questions to ask, how to draw out more details of what you want, and finally produce a mockup design for review and revision. This process can take what you might think is a lot of time. Prior to going into the first meeting, make a list of all of the items you need: meeting space, demo space, demo stations, stage, graphic display areas, etc. I’ve had clients bring us 2D “flat” graphic representations of what they wanted in an exhibit and it was a simple matter to convert that to a 3D rendering. I’ve had clients start with nothing, which meant we talked everything through in detail and let the designer take the lead and produce the first rendering, or a couple of options to choose from.
Different sized exhibits take varying amounts of time, as you might imagine. Custom takes longer than something “off the shelf.” If you want something simple, it’s often a matter of picking something from an online catalog, doing a little customizing and getting it in-hand in a month or two, not the five or size months you’d like for a larger custom island exhibit.
But if you’ve got a show on your calendar that’s six months out, no matter what size exhibit you have, if you’re targeting the show for a new one, it’s time to schedule that first conversation!
It seems like almost every tradeshow exhibit has a big video screen these days. But what about the content? How do you create content that is actually seen and delivers a message that’s critical to your brand amidst the chaos of a tradeshow floor? On this week’s TradeshowGuy Monday Morning Coffee, I chat with Holly Paige of Wave One Films in the Portland area about how to approach creating video for tradeshows:
You have a new tradeshow exhibit. It looked great at the
first show. Congratulations! Now what? Are you going to assume that it’s going
to look the exact same for show 2, 3, 4, 5, and so on?
Unfortunately, it doesn’t necessarily work that way. An
exhibit, whether stored in a touch wooden crate or a plastic molded rollable
case or series of cases, has to be transported from your warehouse to the show
floor. It makes many stops along the way. Forklifts pick it up, drop it down.
It’s in the way when forklifts with other crates are zooming by on the showroom
floor or the warehouse. Forks from the lift seem to have a knack for piercing
crates and causing damage.
In other words, you have to invest to keep that once-new
exhibit looking as good as new. Estimate vary but expect to invest another 5 – 15%
of the original exhibit cost each year to keep it in good shape. And typically,
it’s a good investment. The expected lifetime of an exhibit is about five
years. By updating (new graphics, additional pieces) and refurbishing (paint,
repairs, etc.), you can extend the life of your exhibit, effectively postponing
a capital investment for a few years.
Most of the time that makes sense, but I’ve seen cases where
the company pushed things much farther than practical. Yes, I’ve seen some
exhibits nearly twenty years old, on their last legs, still standing in an
exhibit hall. They were once proud and new, but now are just old and decrepit,
even with a new coat of paint.
The decision to invest in refurbishment or a new exhibit
often depends on a company’s image. With new materials such as aluminum framed
lightboxes and fabric graphics, not only does a new exhibit give your company a
brand-new look on the show floor, but the reduced weight compared to an old
heavy exhibit makes shipping costs come down.
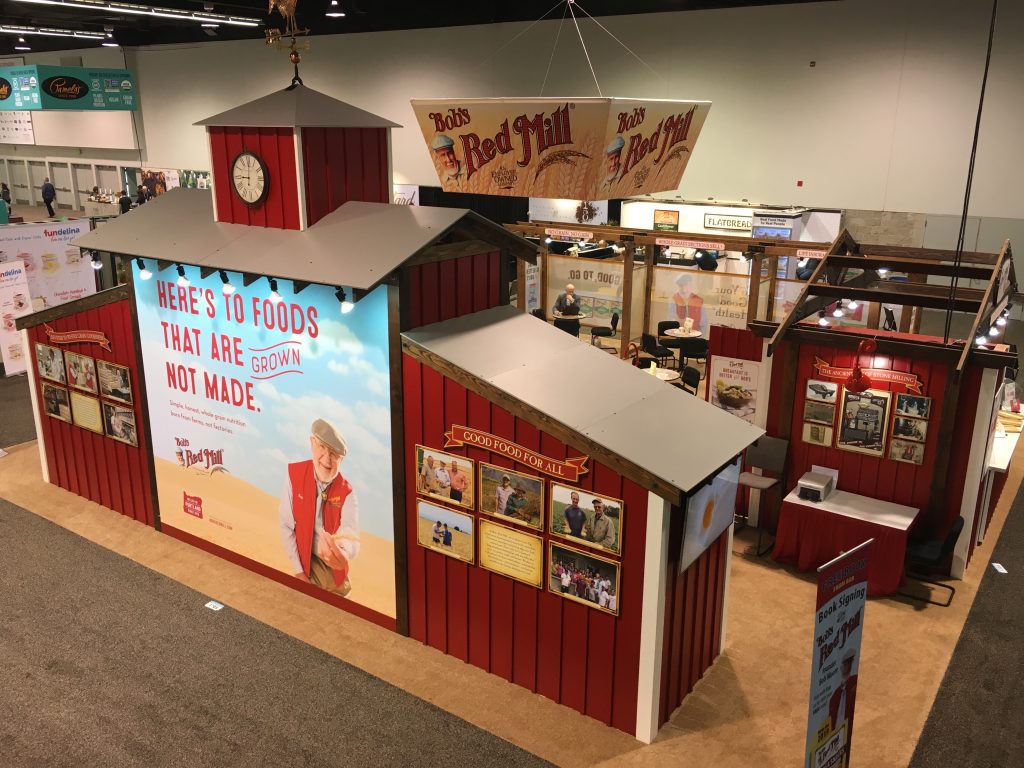
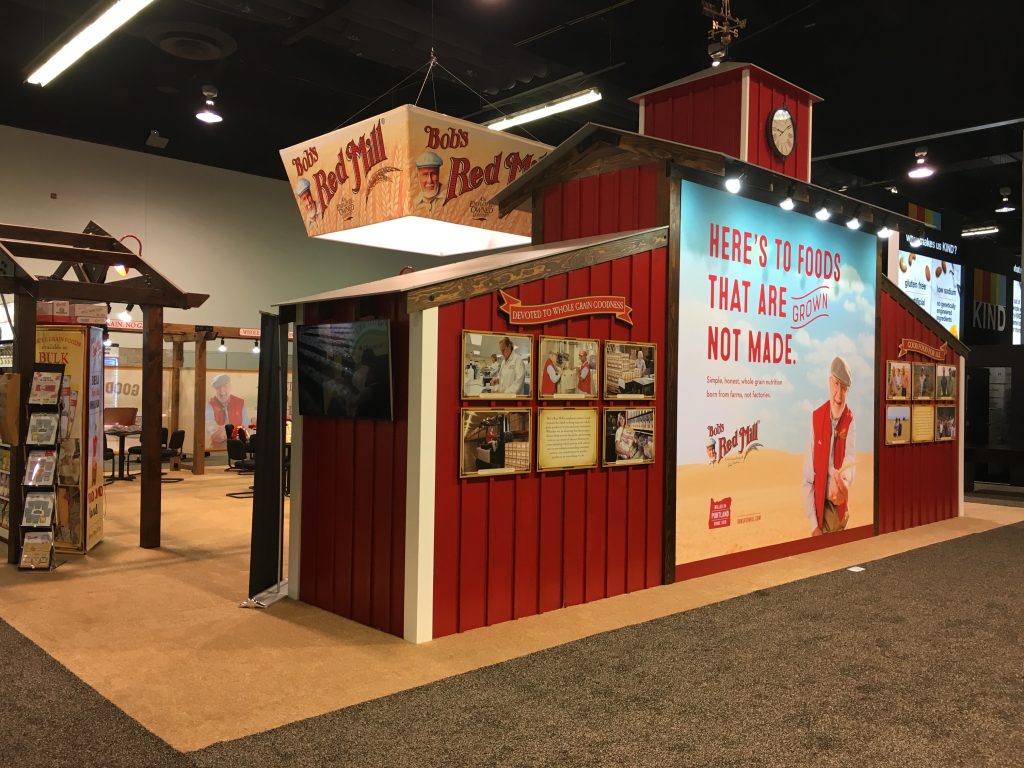
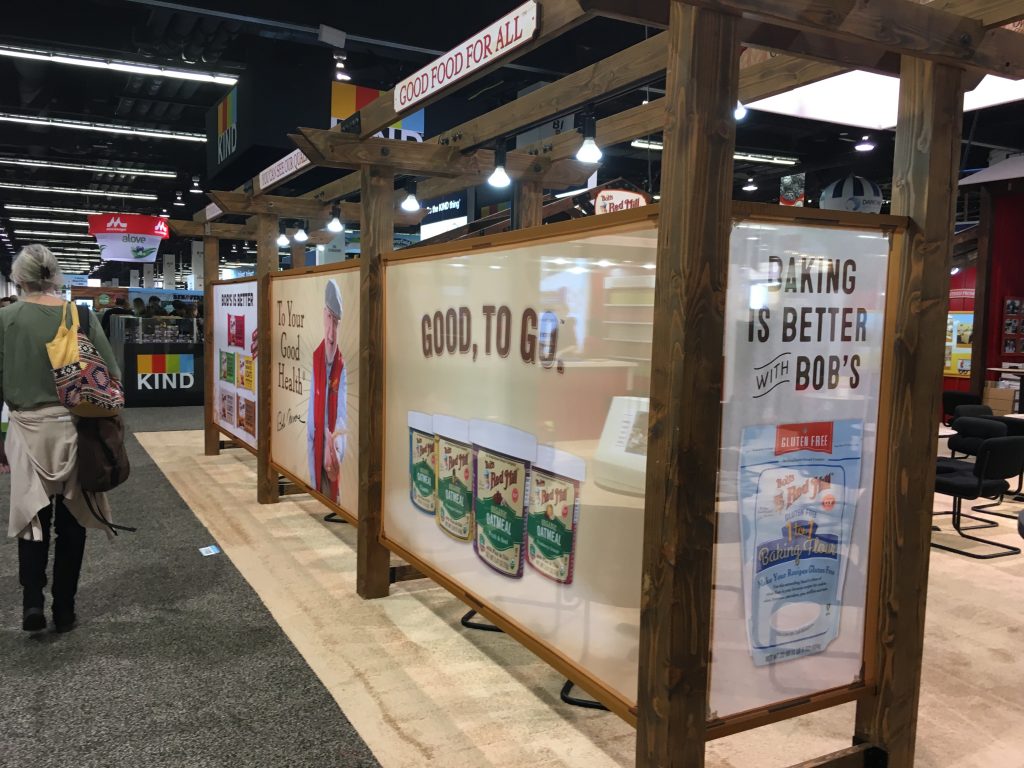
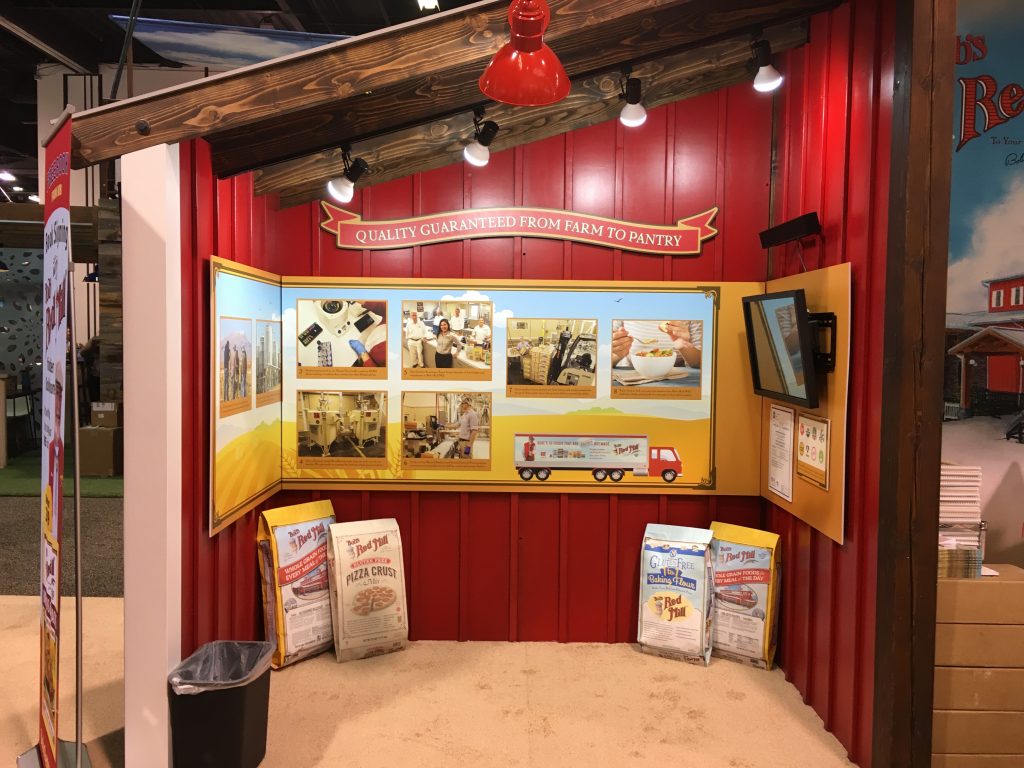
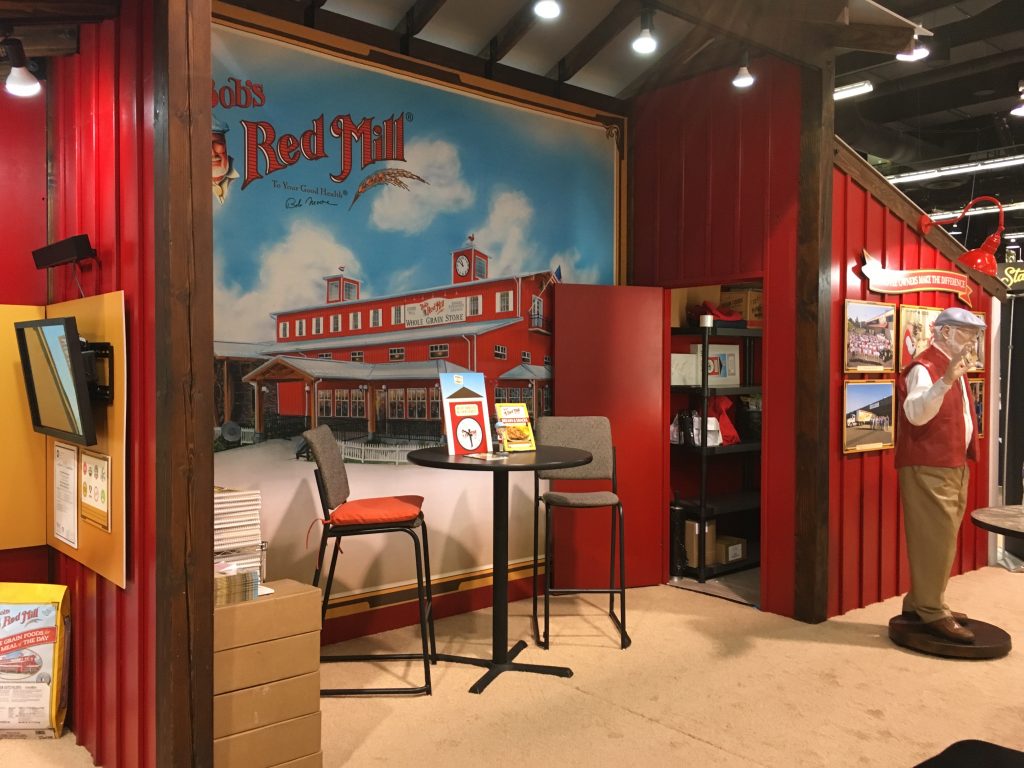
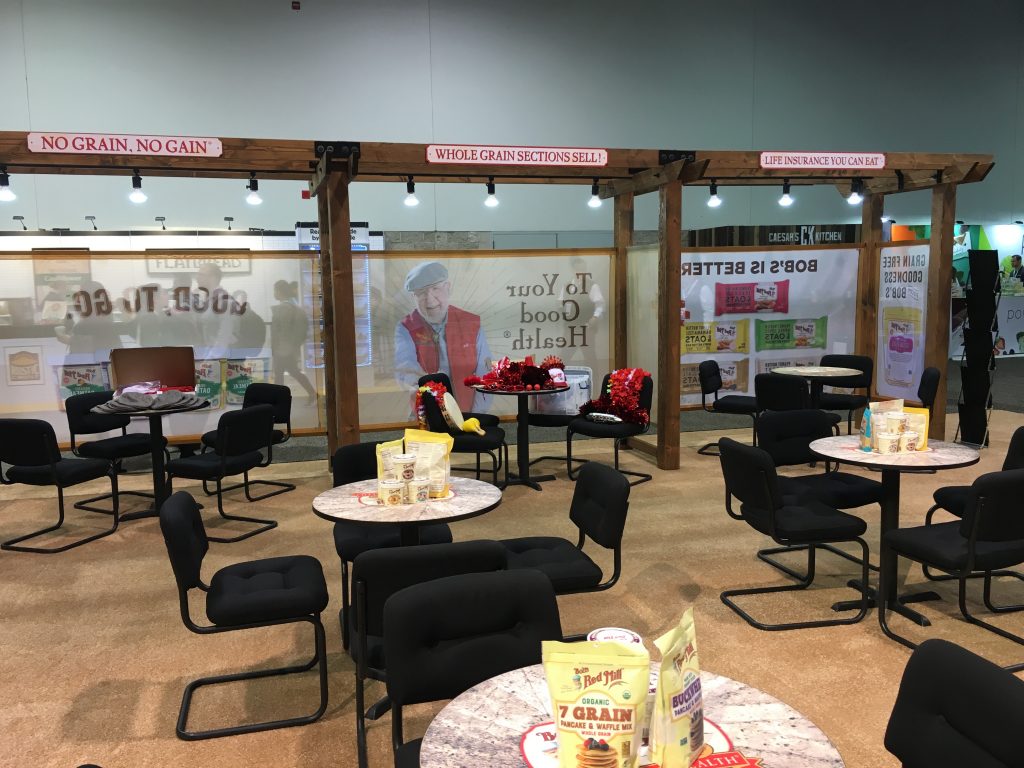
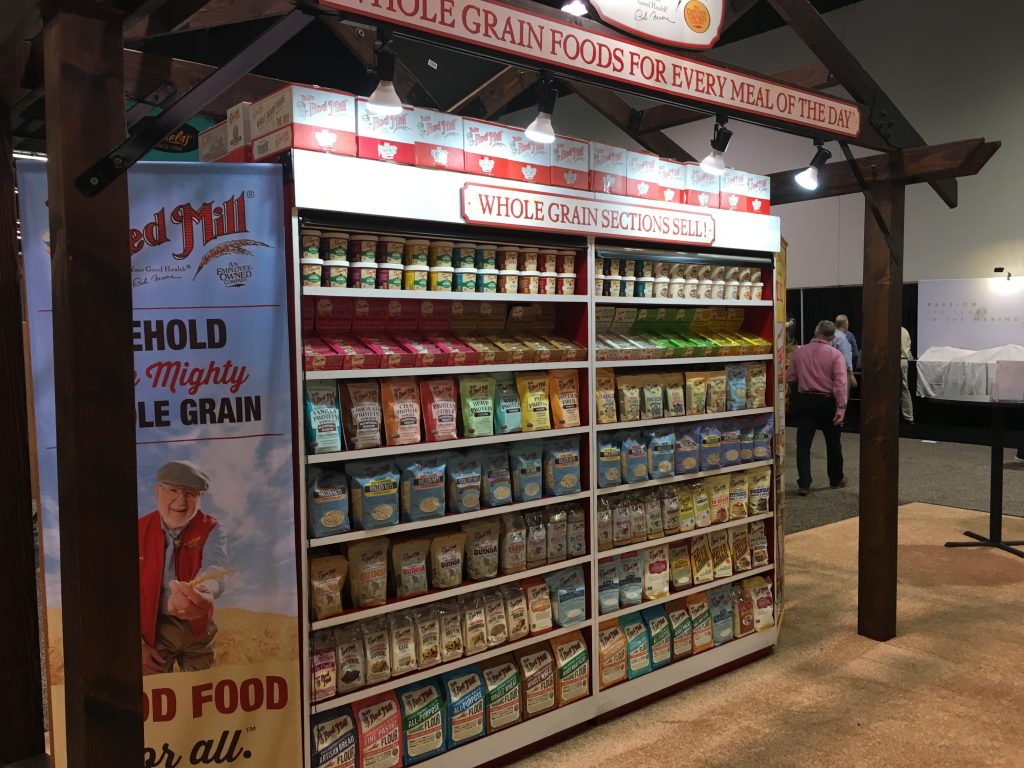
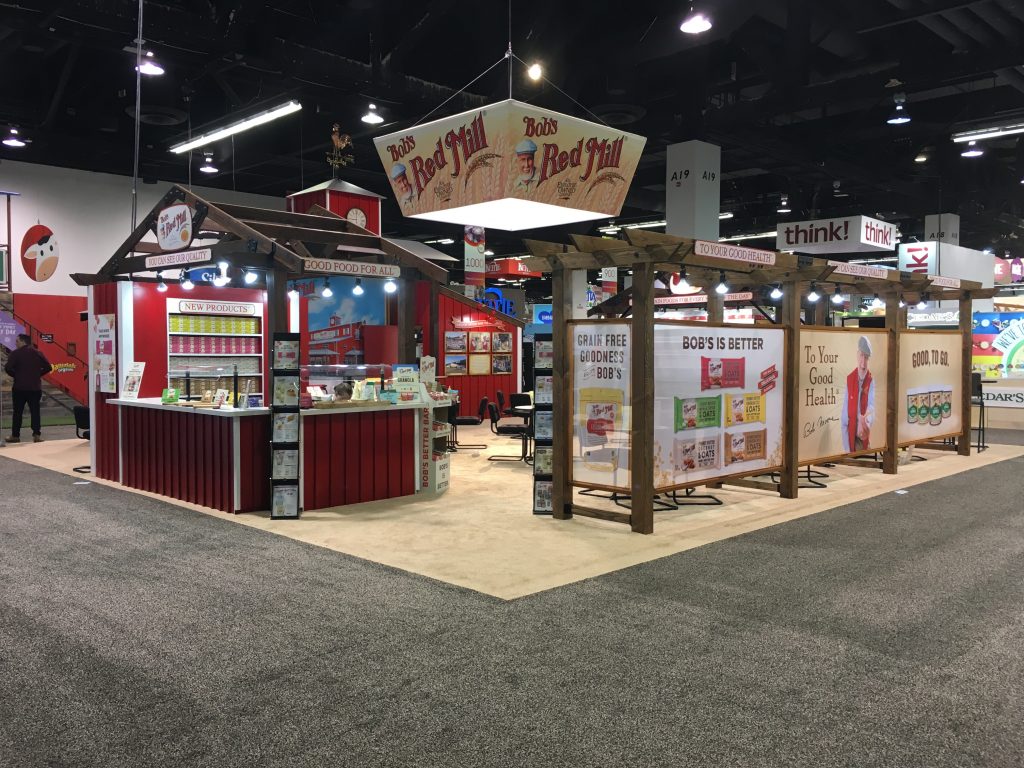
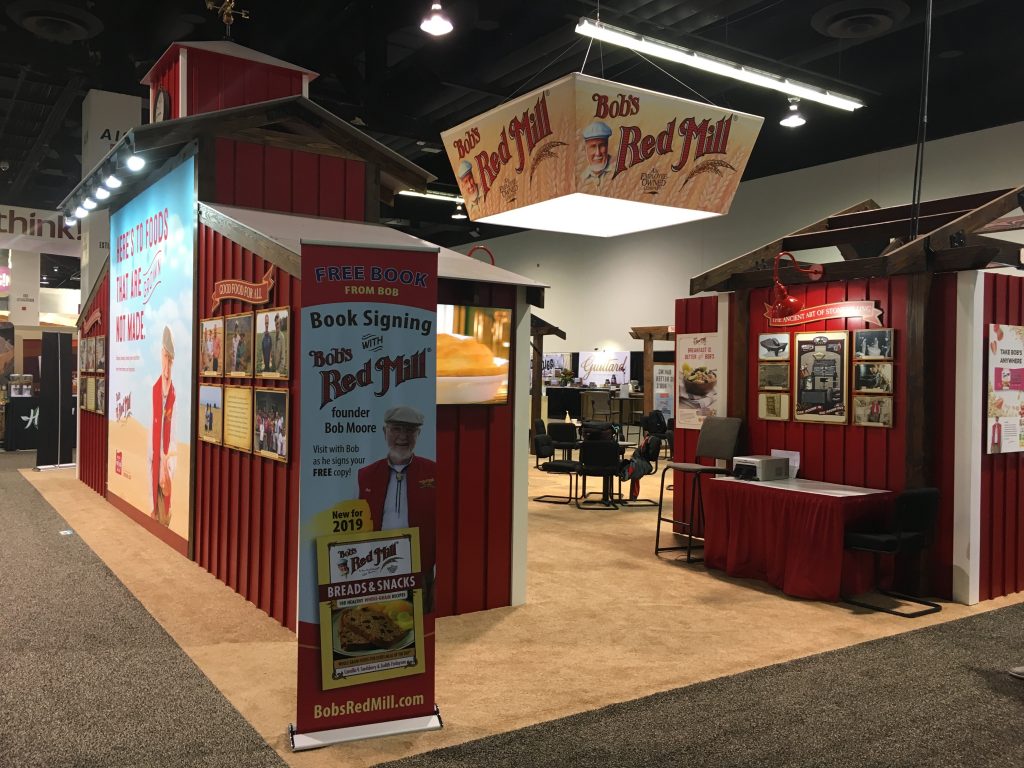
One of our favorite examples of a company deciding to stick with an iconic exhibit and extend the life is our client, Bob’s Red Mill, out of Portland. With a new 30×30 custom exhibit in 2012, they’ve not only expanded and updated, but they’ve dedicated a handful of their staff to make sure the exhibit is in top shape for every show. They refurbish by doing paint touch-up, modest repairs and more. They’ve even invested in new and refurbished shipping crates to further extend the life of the exhibits.
It’s all about getting the most bang for your tradeshow exhibit bucks, and one of the best ways is to extend the life of your exhibit in a creative and sensible way.
Sometimes it makes sense to visualize everything you are planning to do in your next tradeshow appearance. I thought it might fun to put the mindmapping to video and see how it went:
No doubt there are moments in your life where something happened that lead to something else quite unexpected. Taking a look back can you see how you might now be able to connect the dots?
TradeshowGuy Tim Patterson connects several dots in this episode of TradeshowGuy Monday Morning Coffee:
This is a guest article by Lee Becknell of Pinnacle Promotions.
Trade shows take a great deal of forethought and planning, but your business will reap substantial rewards from participating in these types of events. Maybe your business is relatively small and you’re looking to expand your demographic, or you’ve just undergone a company rebranding – trade shows can provide a platform to spread your brand’s message and inform people of your products or services.
Whatever your intentions may be for attending a trade show, you’ll need to put a lot of planning into the process, which includes creating a budget. Use this trade show checklist to ensure your budget is considering all essential components such as promotional products and trade show giveaways, travel and booth fees.
Booth Space
One
of the most essential aspects of your trade show display, your booth should be
secured as soon as you decide to attend an event. The larger the booth space,
the more expensive the rental cost will be, so give some serious thought to how
much space your company will actually need. Aside from booth size, the location
of your display plays a role in price determination. If you’re interested in a
spot closer to the trade show’s entrance, you’re going to end up paying more.
Though a location closer to the entrance may gain more attention, opting for a
booth further in the back of the space could cut costs.
Utility Expenses
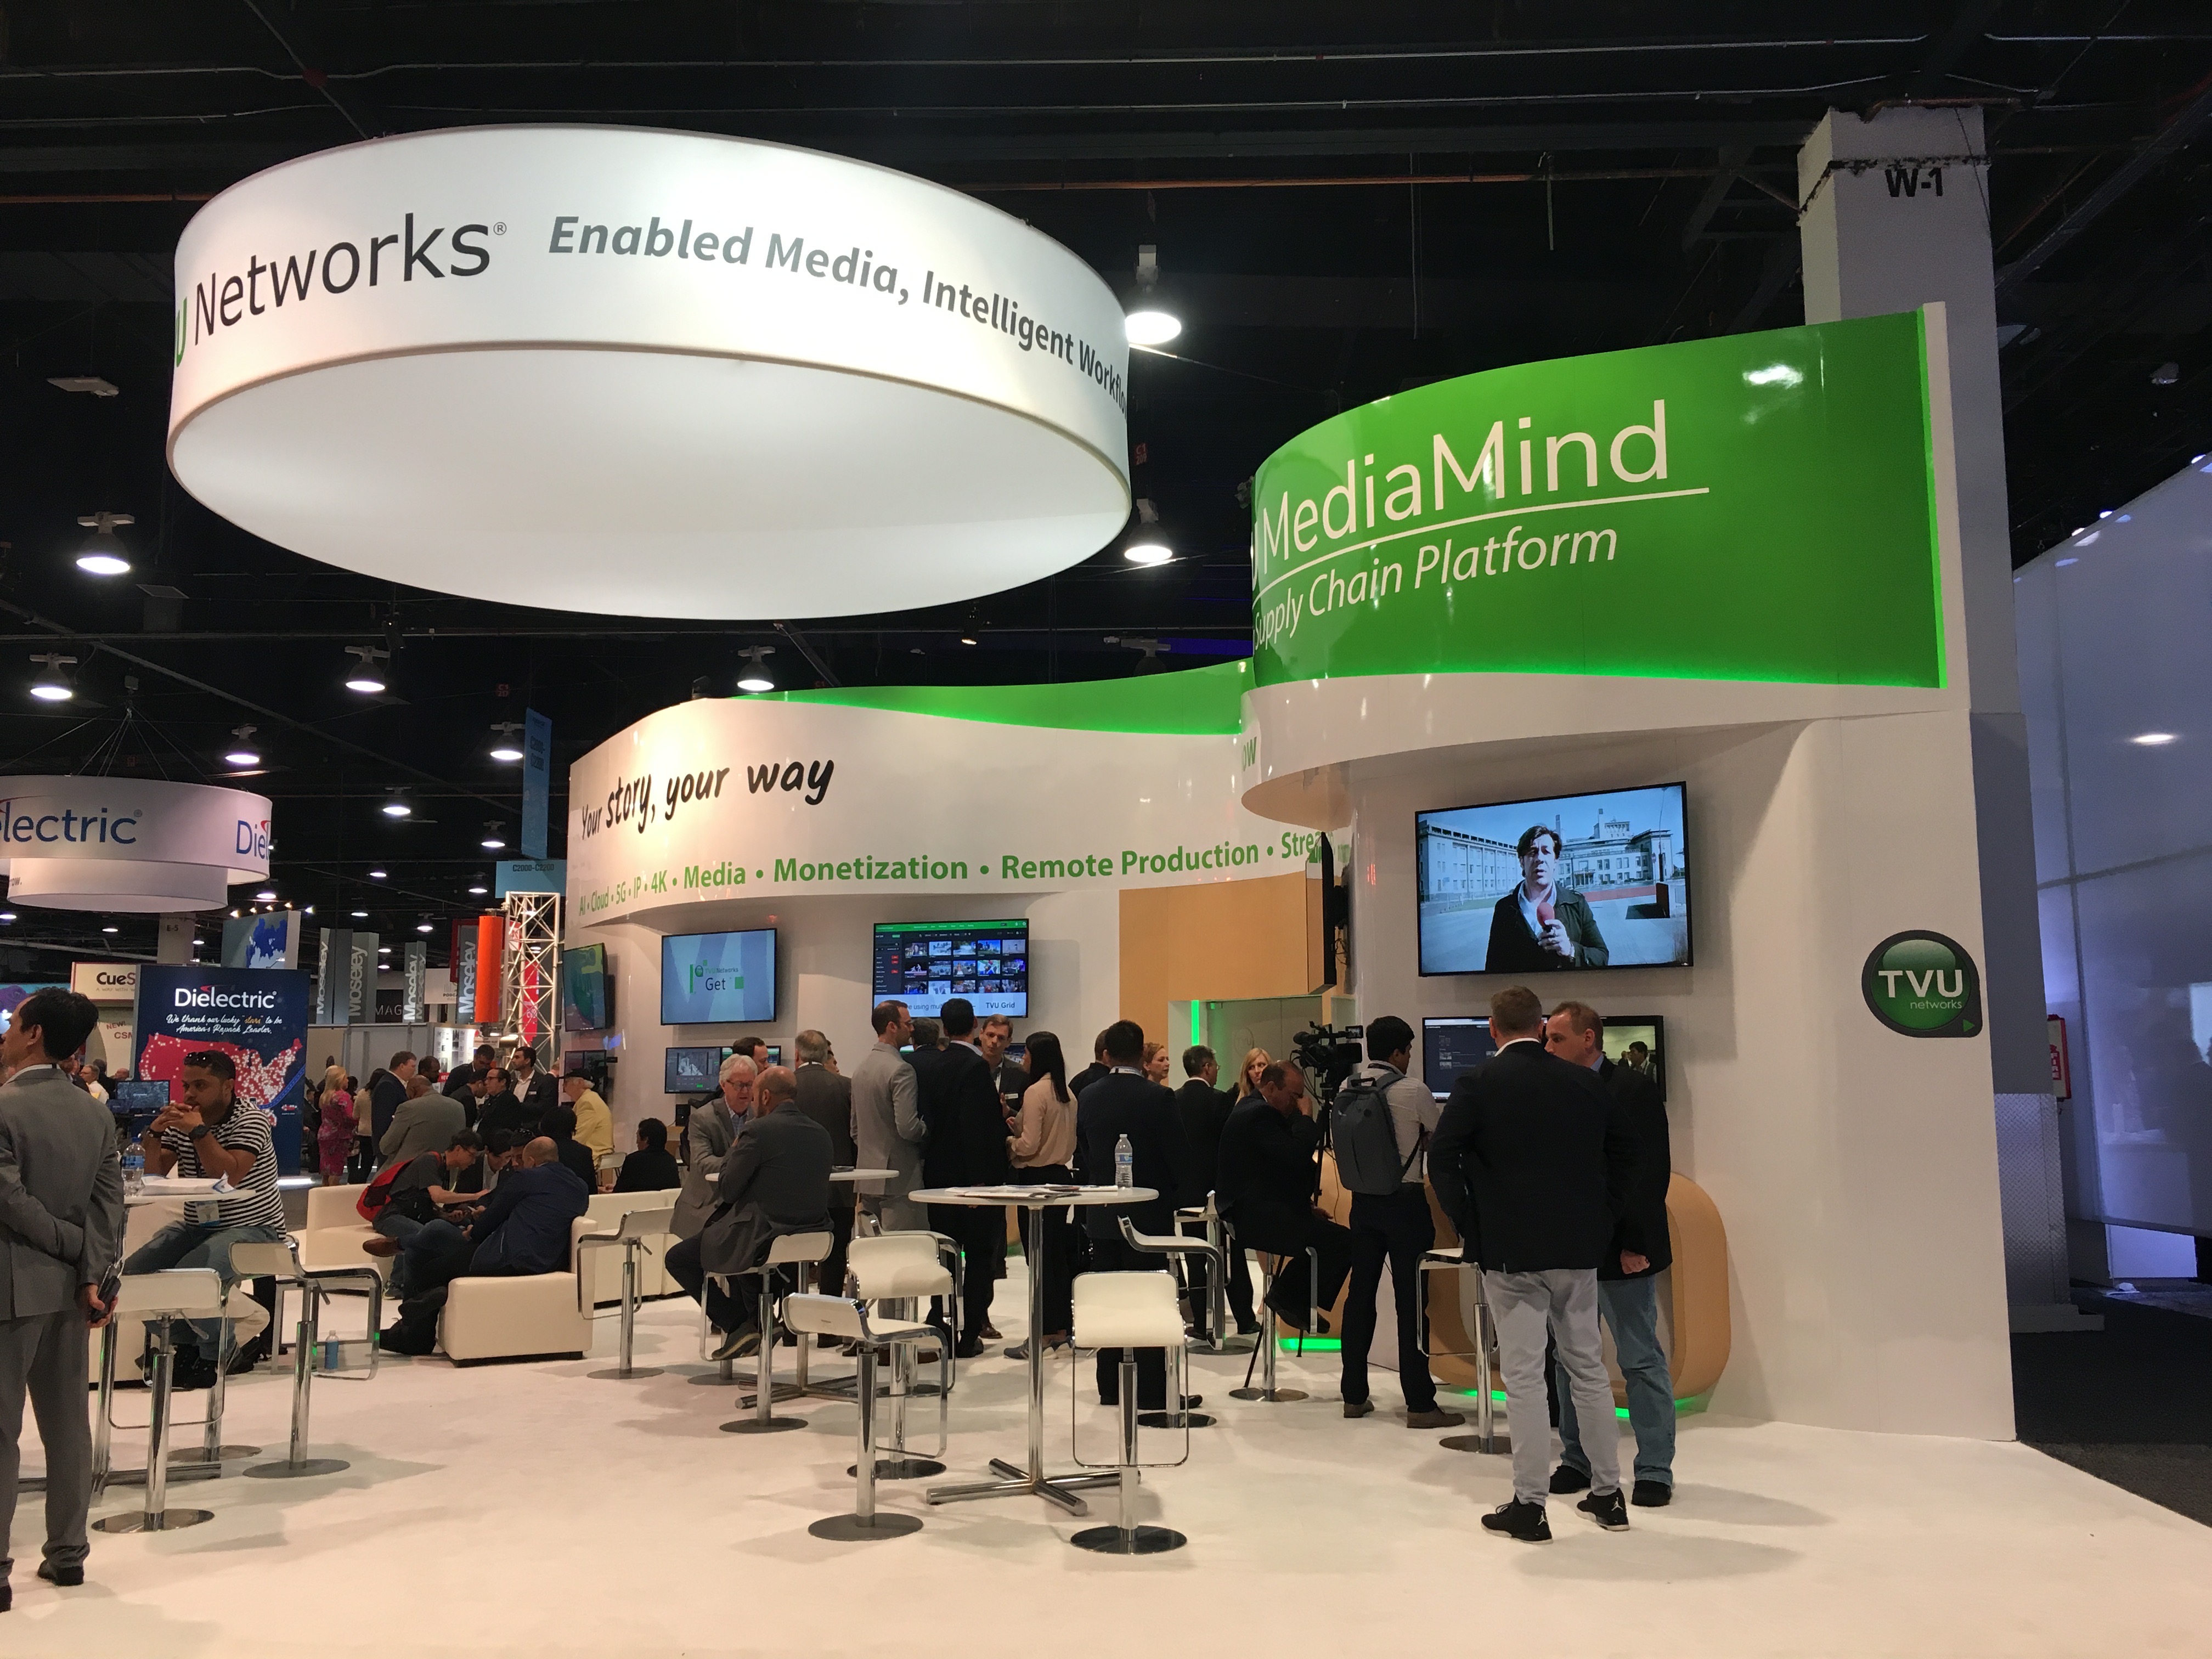
Once you’ve selected a booth at the event, you’ll need to secure any other utilities your display may require, including electricity, WiFi, AV services and other accessories. This part of the budget often gets overlooked by those who are not as experienced with trade shows. As you’re planning for the event, consider what types of extras your booth may require. Are you planning to play an informational video about your company or show photos of products? You’ll need to make arrangements for electronic connections and TV displays. Write down any additional costs and then inquire with companies near the event space to get a price estimate and add this into your budget.
Staff Costs
For a successful trade show experience, you’ll need a well-trained, professional group of employees who are willing to attend the event and share their expertise with guests. Because trade shows are typically considered occurrences outside of normal work hours, you should factor in additional wages to compensate qualifying staff members. Prior to the event, you’ll also need to train employees on what to say, how to behave and what to wear at these events. To present a sleek, united front between employees, you can purchase uniforms specifically designed for trade shows like comfortable Nike t-shirts branded with your company’s logo.
Travel and Accommodations
Aside
from booth rentals, traveling to the event can be one of the most expensive
parts of your trade show budget. The best way to keep this cost down is through
early planning. Determine which trade shows your company will attend for the
entire year and then begin scheduling travel plans right away to avoid rising
prices as the event approaches. Work with other members of the marketing team
to decide how many employees will be needed at the event. Then, factor in the
cost of flights or renting vehicle transportation plus hotel accommodations.
Keep in mind that booking a place to stay far from the event may save money in
the short term, but don’t forget the additional travel costs to get from the
hotel to the convention center.
Promotional Products and Trade Show
Giveaways
An
excellent method for spreading your company’s message and brand, promotional
products and trade show giveaways, commonly called “swag,” should be a focus
for your trade show preparation. Offering some useful or unique items to
attendees is a great way to capture their attention and give them something to
take home that will remind them of your company.
Select well-known brand-name items and have them personalized with your logo or choose a promotional product that’s beneficial to others in your industry. It’s best to order these items in bulk to get the lowest possible price. In order to plan how much you’ll spend on promotional products, estimate how many trade shows the company will attend in a year and then research how many people are expected at each event to get a sense for the number of promotional products you should have on hand.
Booth Graphics
Now that you have your booth space figured out, you need to consider how you’re going to make your company’s area look attractive and professional—feel free to get creative here. Most companies that attend trade shows will order custom signs with the name of their business and sometimes the company motto. Offering brochures or pamphlets can help inform attendees about your business and give them something to remember you by along with promotional products. People who frequent trade shows are interacting with dozens of different businesses in a matter of hours or days. It’s rare that attendees will remember every single company they encountered, so providing them with helpful reminders, like handouts and trade show giveaways, will encourage information retention and may generate prospective leads.
Plan How to Transport Booth
Accessories
Another minor detail that many companies overlook when planning for trade shows, logistics are essential to transporting your supplies. If you’re traveling a long distance with a lot of equipment (think TV displays, furniture for your booth, etc.), then you’ll likely need to book a freight service to deliver the accessories. For companies that don’t require much equipment, you can also consider shipping essential items, including your promotional products, to the trade show location to lower your overall cost. Be sure to get an estimate on either logistics services or shipping costs when planning your budget.
Lee Becknell serves as the Senior Digital Marketing Manager for Pinnacle Promotions. Lee oversees digital marketing from the Atlanta, GA headquarters. Lee has been with Pinnacle for over six years. Lee enjoys spending time with her husband, son and golden retriever, running and taking naps.
You might think that designing graphics for a tradeshow
exhibit is hardly any different from designing graphics for a brochure or a
website. But you’d be wrong. There are a number of differences, and an
experienced tradeshow graphic designer is an invaluable asset if you’re facing
the prospect of doing it alone.
First things first. What’s different? The most obvious is
that graphics are much bigger on a tradeshow exhibit than a website or brochure
or sales sheet.
Second thing is that people will interact differently with tradeshow
graphics than they will with a brochure or a website, which means your approach
to crafting a design with an impactful message must be different.
Your message must be clear
And third, and perhaps the most important, the resolution of
the tradeshow graphic file will by its very nature be much higher than a web
design or print design.
High resolution is a must for tradeshow graphics
Since graphics are much bigger, and since people interact
with tradeshow graphics differently than with websites and printed material,
the design and messaging have to reflect that difference. Thousands of people
walk by a typical tradeshow on any given day. They glance but often don’t see
the graphic messaging. If their brain stops for anything, it’s for either a
familiar logo or a bold question or statement. A supporting image such as a
photograph can also be a factor in keeping someone attention for another few
seconds if you’re lucky. Great care and decision making must go into the
design: what image resonates with your brand and attracts attention? What
message is important and can be communicated in a few short words?
File preparation is critical to keeping things on schedule
Finally, the crafting of the digital graphic files is
critical to ensure high resolution in the output. I’m not a designer or a graphic
printing technician, but I can pass along some of the general guidelines on how
to prepare the files.
File Formats
Each printing facility and tradeshow exhibit house will vary
slightly, but the main things to keep in mind are to make sure the graphics are
submitted in an acceptable format. Typically, most printers accept Photoshop,
Adobe Illustrator, Adobe InDesign or high-resolution PDFs. Other programs such
as Quark, FreeHand, CorelDraw and Publisher are typically not acceptable.
Neither are files such as Microsoft Word, or low-resolution JPEG, GIF, PICT or BMPs.
Font Specifications
Fonts are typically converted to outlines. If not, you’ll
need to provide Macintosh of TruType fonts with the files.
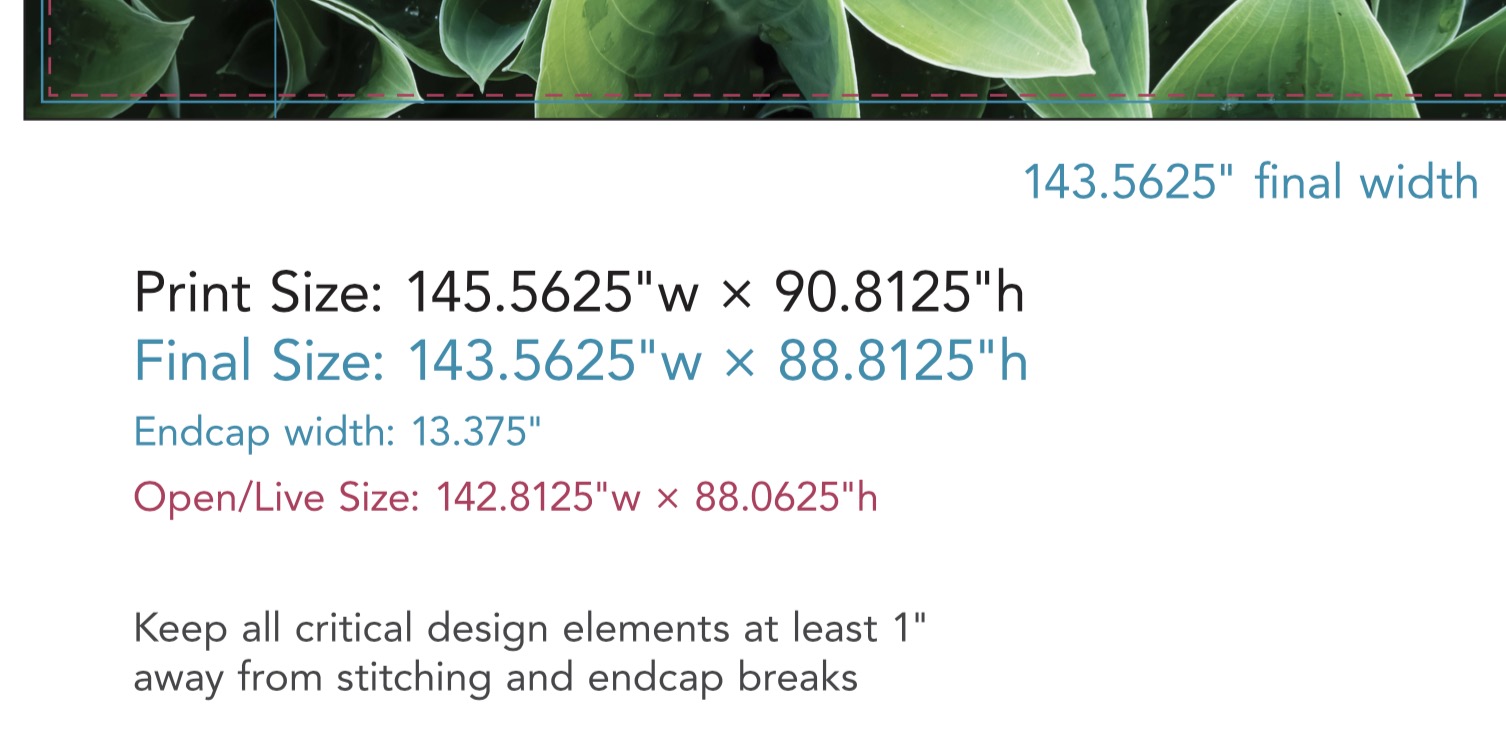
Resolution
This differs from shop to shop, but I generally see
requirements of setting up files at 100-120 pixels per inch at 100%. Anything
smaller and the final print will show pixelization.
Color Specifications
Again, varies from shop to shop, but most ask for vector
files in CMYK (Cyan, Magenta, Yellow, Black), and raster artwork in RGB (Red,
Green, Blue). If this is over your head, speak to your graphic designer. An
experienced designer can address these issues.
Uploading and Sharing Files
Given than tradeshow graphics are high resolution and cover
a lot of square feet, the graphic production files are going to be big. We just
did a set of banner stands this week where the graphic files for five stands
amounted to about a gigabyte. Too big to email, so it’s got to be transferred.
We typically create a sharable file on DropBox, but there are other tools to
share big files, such as HighTail, Google Drive, SendSpace and others. Again,
pretty easy to do. In fact, many companies have dedicated FTP sites where you can
upload directly to them.
Final Thoughts
The topic of tradeshow graphic design, file creation and
production can take up several books, and no doubt it has. This short blog post
barely scratches the surface. Need to know more? Speak with experienced
designers and production people that do it every day. They’re happy to share
their knowledge and make sure you get the highest quality graphic you can.